Vinyl flooring is one of the most popular and practical choices in Melbourne homes - affordable, water-resistant, and easy to maintain. When scratches appear, the natural question is whether you can polish them away and restore the floor’s original finish. The honest answer is: in many cases, yes. Light to moderate scratches can be improved or effectively eliminated with the right approach. Deeper gouges are more challenging, but there are still options short of full replacement.
This comprehensive guide walks you through everything you need to know about polishing vinyl floors - from assessing the damage through to applying the right product and maintaining your results.
How Do Scratches Form on Vinyl Flooring?
Vinyl flooring comes in several formats - Luxury Vinyl Plank (LVP), Luxury Vinyl Tile (LVT), and traditional sheet vinyl. Each has a protective wear layer on the surface that determines how resistant the floor is to scratching. Thicker wear layers (measured in thousandths of an inch, or mils) are more resistant; thinner layers scratch more easily.
Scratches typically form through:
- Heavy furniture being dragged across the floor
- Abrasive grit from footwear being ground against the surface
- Sharp objects dropped onto the floor
- Abrasive cleaning tools used during routine maintenance
The depth of the scratch determines what level of treatment is possible. Shallow surface scratches that have not penetrated the wear layer are the most amenable to polishing. Scratches that have cut through the wear layer into the vinyl substrate below are more challenging and may require filler or panel replacement.
Understanding Scratch Severity: A Practical Assessment Guide
Before committing to any repair approach, it helps to categorise the damage you are dealing with. Vinyl floor scratches generally fall into three levels of severity, and each level responds differently to treatment.
Level 1: Surface Scuffs and Light Scratches
These are the most common type of vinyl floor damage in Melbourne homes. Surface scuffs appear as dull marks or faint lines on the floor’s surface and typically have not penetrated the wear layer at all. They are often caused by rubber-soled shoes, soft furniture feet, or light contact with objects being moved across the floor. A microfibre cloth and vinyl-specific polish will usually address these completely.
Level 2: Moderate Scratches
Moderate scratches are visible as distinct lines in the surface and may catch the light at certain angles. They have penetrated into the wear layer but not through it. These scratches respond well to polishing products and may require two or three applications to achieve a satisfactory result. Most DIY polishing success stories involve this category of damage.
Level 3: Deep Gouges and Cuts
Deep scratches that have cut through the wear layer into the vinyl core are the most challenging to address. These are typically caused by heavy furniture being dragged without protection, sharp objects dropped from height, or sustained abrasion in one location. Polishing alone will not fully repair these scratches - they require filler compounds, professional re-coating, or plank replacement.
Understanding which level of damage you are dealing with saves time, money, and frustration. If most of your scratches are Level 1 or 2, a DIY approach with the right products is likely to produce satisfying results. If you are dealing primarily with Level 3 damage, professional assessment is the better starting point.
How Do You Assess Vinyl Floor Scratches Before Polishing?
Before investing time and product in polishing, assess the scratches honestly:
- Run a fingernail across the scratch. If it catches in a groove, the scratch is deeper than the surface and may need filler rather than polishing alone.
- Clean the area first. Dirt and grime can make scratches look more severe than they are. Clean the area thoroughly and reassess once dry.
- Look at the scratch in raking light - light at a low angle to the floor surface - to judge depth and extent more accurately.
Set realistic expectations. Polishing is not a perfect solution for deep scratches, but even deep scratches can be made significantly less noticeable with the right approach.
How Should You Prepare the Surface for Polishing?
Preparation is the most important step and the one most often skipped. Polishing over an unclean surface pushes grit into the vinyl and can cause new scratches in the polishing process itself.
- Sweep or vacuum thoroughly with a soft-bristle attachment to remove all loose debris.
- Mop with a vinyl-safe cleaner - a mild, pH-neutral floor cleaner diluted in warm water works well. Avoid acidic or abrasive cleaners.
- Rinse with clean water and allow the floor to dry completely before proceeding.
- Spot test your chosen polishing product in a concealed area - under a piece of furniture, inside a cupboard, or in a corner. Apply, allow to dry, and check for any adverse reaction before treating visible areas.
- Protect adjacent surfaces if working near skirting boards or walls.
How Do You Choose the Right Polishing Product for Vinyl?
Not all floor polishes are suitable for vinyl. Key considerations:
- Vinyl-specific floor polish or sealer. Look for products labelled for use on luxury vinyl plank, LVT, or no-wax vinyl floors. These are formulated to bond with vinyl surfaces and provide a protective gloss layer.
- Self-polishing formulas. These products create a gloss finish as they dry and buff to a shine with minimal effort. They can also fill minor surface imperfections, reducing the visibility of fine scratches.
- Low- or no-wax options. Traditional wax-based polishes are not suitable for modern no-wax vinyl - they build up a cloudy, hard-to-remove residue. Choose low-wax or wax-free formulas.
- Avoid products not designed for vinyl. Hardwood floor polish, tile sealers, and solvent-based products can damage vinyl surfaces.
For professional-grade vinyl floor buffing and polishing in Melbourne, Total Cleaning Melbourne uses commercial products and equipment that deliver a consistently high-quality finish.
DIY Polishing vs Professional Vinyl Floor Restoration
Knowing when to handle scratches yourself and when to call in a professional is one of the most practical decisions a Melbourne homeowner can make. Both approaches have their place.
When DIY Polishing Makes Sense
- Surface scuffs and light scratches across a small area
- A single room or hallway that needs a refresh
- Floors that are in generally good condition with isolated damage
- Situations where you have time to apply multiple thin coats and allow proper drying
When Professional Service Is the Better Choice
- Scratches are widespread across multiple rooms or large floor areas
- Damage includes deep gouges or cuts through the wear layer
- The floor has lost its overall sheen and looks uniformly dull
- Previous DIY attempts have left residue, uneven finish, or worsened the appearance
- The floor is in a commercial space where presentation standards matter
- You need a durable, long-lasting result rather than a temporary improvement
Professional vinyl floor polishing and buffing uses commercial-grade equipment - high-speed buffing machines, industrial polishes, and multi-coat sealing systems - that achieve results simply not possible with consumer products and manual application. A professional service also includes assessment of the overall floor condition, identification of areas at risk of further damage, and recommendations for ongoing maintenance.
For Melbourne properties with vinyl flooring in moderate to poor condition, professional restoration typically represents better value than repeated DIY attempts that may not deliver lasting improvement.
What Are the Best Polishing Techniques for Vinyl Floors?
For small areas and individual scratches: Use a clean, soft microfibre cloth. Apply a small amount of polish to the cloth (not directly to the floor) and work it into the scratch in small circular motions. Allow to dry as directed, then buff with a clean, dry microfibre cloth.
For larger areas: Apply the polish in thin, even sections - pour a small amount onto the floor and spread with a clean microfibre mop, working in the direction of the plank or tile lines rather than across them. Avoid applying too much product at once; multiple thin coats produce better results than a single heavy application. Allow each coat to dry fully before applying the next.
For buffing: Once the product has dried to the specified time, buff the surface with a clean pad or mop head to bring up the gloss. This step also reveals any areas where the product has pooled or dried unevenly, allowing you to address them before they harden.
What Are the Options for Deeper Vinyl Floor Scratches?
When polishing alone is insufficient:
Vinyl floor filler: Purpose-made vinyl floor filler compounds can be used to fill deeper scratches before polishing. Choose a colour-matched product that blends with your floor. Apply sparingly, level with a plastic spreader, and allow to cure fully before sanding lightly and applying polish over the top.
Re-coating: For floors where scratches are widespread, a professional re-coating service applies a fresh protective layer over the entire floor surface, effectively resetting the wear layer. This is more cost-effective than replacement and provides a uniform result.
Plank or tile replacement: For LVP and LVT formats, individual damaged planks or tiles can often be replaced without disturbing the surrounding floor. This is the most effective solution for severe, concentrated damage.
Vinyl Flooring Brands Popular in Melbourne Homes
Melbourne homeowners commonly encounter vinyl flooring from several well-known brands, each with slightly different wear layer specifications and maintenance characteristics:
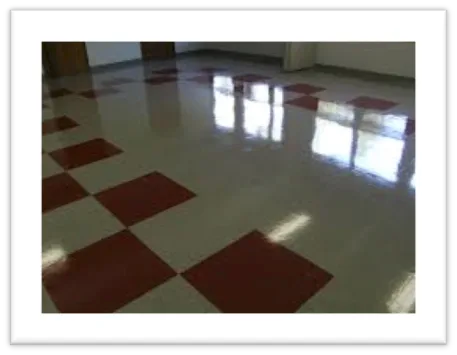
- Karndean - Premium LVP and LVT with thick wear layers (0.55mm commercial grade). Known for durability and realistic timber and stone designs. Responds very well to professional polishing and re-coating.
- Amtico - Another premium option frequently specified in Melbourne renovations. Similar wear layer quality to Karndean with excellent scratch resistance when properly maintained.
- Polyflor - Widely used in Melbourne commercial and healthcare environments. Available in a range of wear layer thicknesses suited to different traffic levels. Polyflor provide specific maintenance guidance for each product range.
- Gerflor - Common in Melbourne schools, aged care facilities, and healthcare settings. These floors are designed for high-traffic environments and respond well to regular buffing and periodic resealing.
- Budget LVP brands - Thinner wear layers (0.3mm or less) are common in entry-level vinyl plank products sold through major hardware retailers. These floors scratch more easily and have a shorter maintenance life, but still benefit significantly from professional polishing and sealing.
Regardless of brand, the maintenance principle remains the same: regular professional attention preserves the wear layer and extends the floor’s useful life. If you are unsure which product is installed in your Melbourne home, a floor care professional can typically identify the type during an inspection visit.
How Can You Prevent Future Scratches on Vinyl Flooring?
Protecting your vinyl floor investment is simpler than repairing damage:
- Fit felt pads to all furniture legs - even furniture that is not moved frequently benefits from felt pads, as small daily adjustments can cause micro-scratches.
- Use a soft-bristle broom or vacuum with a hard floor setting - beater bar vacuums can scratch vinyl.
- Place entry mats at all external doors to capture grit before it reaches the floor.
- Avoid dragging heavy objects across vinyl - use a furniture dolly or protective moving pads.
- Clean spills promptly and avoid leaving standing water on vinyl for extended periods.
- Trim pet claws regularly - dogs and cats can cause significant cumulative scratching on vinyl floors, particularly in Melbourne homes where pets move between outdoor and indoor areas frequently.
- Avoid rubber-backed mats directly on vinyl - some rubber compounds can cause discolouration or chemical reactions with the vinyl surface over time. Use mats with fabric or felt backing instead.
Frequently Asked Questions
Q: Can I use coconut oil or olive oil to fix scratches on vinyl flooring?
These natural oils are sometimes suggested as DIY scratch treatments, but they are not recommended for vinyl flooring. They can leave a greasy residue that attracts dirt and can degrade the appearance of the floor over time. Use products specifically formulated for vinyl instead.
Q: How long does vinyl floor polish take to dry?
Most vinyl-specific polishes dry to touch within 30 to 60 minutes and reach full hardness within two to four hours. Avoid walking on the polished area during the drying process and leave furniture off the floor for at least 24 hours.
Q: Can professional buffing restore very scratched vinyl floors?
Professional buffing and re-coating can significantly improve the appearance of scratched vinyl floors, even when individual scratch treatment is no longer practical. Total Cleaning Melbourne’s vinyl floor buffing and polishing service can restore floors that appear beyond saving, extending their life and avoiding the cost of early replacement.
Q: How often should vinyl floors be professionally polished in Melbourne?
For residential properties with normal foot traffic, professional polishing every six to twelve months maintains an excellent appearance. Homes with pets, young children, or heavy use areas may benefit from more frequent treatment. Commercial properties typically require quarterly polishing to maintain presentation standards.
Q: Will polishing vinyl floors make them slippery?
Quality vinyl-specific polishes are formulated to maintain appropriate slip resistance. Unlike wax-based products that can create a dangerously slippery surface, modern vinyl polishes enhance shine while preserving the floor’s textured grip. If you have concerns, ask your floor care professional to recommend a product with verified slip-resistance ratings.
For professional vinyl floor care across Melbourne, contact Total Cleaning Melbourne today and let our experienced team restore the gloss and appearance of your floors.
Need professional cleaning help?
Our IICRC-certified team services all Melbourne suburbs. Get a free, no-obligation quote today.
IICRC-certified cleaning professionals serving all Melbourne suburbs since 2014.